Every home chef and passionate baker knows the secret to truly outstanding culinary creations often lies in the quality of their tools. Among these, the unassuming Baking Sheet Tray stands out as a true kitchen MVP. More than just a flat piece of metal, a well-chosen baking sheet tray can transform your cooking, ensuring everything from perfectly golden cookies to beautifully roasted vegetables emerges with consistent, delicious results. Whether you’re a seasoned pro or just starting your baking journey, understanding the nuances of this essential piece of bakeware is key to unlocking its full potential.
What is a Baking Sheet Tray?
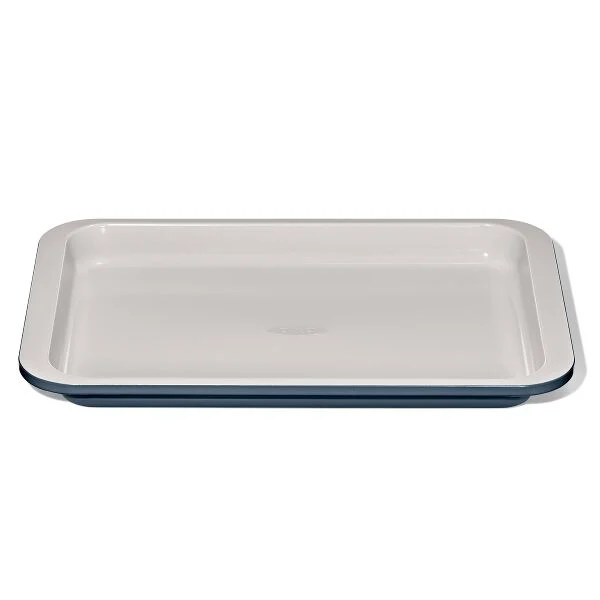
At its heart, a baking sheet tray is a flat, rectangular metal pan designed for use in an oven. Often referred to interchangeably as a “sheet pan” or “cookie sheet,” its primary purpose is to provide an even, stable surface for cooking. While the term “cookie sheet” sometimes implies a pan with only one or two raised edges for easy sliding, a true baking sheet tray typically features a shallow rim around all four sides. This rim is a game-changer, containing liquids and preventing food from sliding off, making it incredibly versatile for everything from baking delicate pastries to roasting hearty meats and vegetables. The earliest recorded use of sheet pans dates back to Scotland, highlighting their long-standing role in kitchens worldwide.
Unveiling the Diverse World of Baking Sheet Trays
Choosing the right baking sheet tray can feel overwhelming with the myriad of options available. Let’s break down the key factors: materials, non-stick coatings, and sizes.
Materials Matter: The Foundation of Your Baking Sheet Tray
The material of your baking sheet tray significantly impacts its performance, affecting heat distribution, durability, and suitability for different tasks.
- Aluminum: This is the undisputed workhorse of commercial and home kitchens alike. Aluminum is an excellent heat conductor, meaning it heats up quickly and distributes heat evenly across the surface, promoting consistent browning and cooking. It’s lightweight and typically more affordable. However, bare aluminum can react with acidic foods, potentially causing discoloration or imparting a metallic taste. It’s also susceptible to staining and may discolor in a dishwasher.
- Aluminized Steel: Combining the best of both worlds, aluminized steel features a steel core coated with an aluminum-silicon alloy. This construction offers the robust durability and rigidity of steel with the superior heat conductivity of aluminum. It’s highly resistant to warping, corrosion, and rust, making it a favorite for those seeking a long-lasting, high-performance option. While often pricier, it’s a worthwhile investment for serious bakers.
- Carbon Steel: Known for its strength, ductility, and excellent heat conduction, carbon steel heats quickly and evenly, making it ideal for fast, high-temperature cooking. It’s also highly temperature-resistant and lightweight. Like cast iron, it can develop a natural non-stick patina over time if seasoned properly.
- Stainless Steel: While durable and non-reactive, stainless steel is not the best conductor of heat on its own, which can lead to uneven cooking. Manufacturers often enhance it with an aluminum or copper core to improve heat distribution. Stainless steel is easy to clean and resistant to rust and staining, but generally less favored for baking sheets where even browning is paramount.
- Glass, Ceramic, and Stoneware: These materials are attractive and excellent at retaining heat, making them suitable for dishes where sustained, even heat is beneficial, like casseroles or bread puddings. However, they are slower to heat up and cool down, and can sometimes lead to over-browning on the edges of baked goods. For delicate baking, metal pans are generally preferred.
The Non-Stick Debate: Convenience vs. Durability
Many baking sheet trays come with a non-stick coating. This PFOA-free surface offers unparalleled convenience, allowing for easy food release and making cleanup a breeze. However, non-stick coatings can scratch and wear down over time, especially with the use of metal utensils, which significantly shortens the pan’s lifespan. They also typically have a lower maximum oven-safe temperature. For most versatile cooking tasks, many professionals still prefer uncoated pans, relying on parchment paper or silicone baking mats for non-stick benefits and easier cleanup.
Size Matters: Finding Your Perfect Fit
Baking sheet trays come in various standard sizes, with “half-sheet” pans being the most common and versatile for home ovens.
- Full-Size (18″ x 26″): These are commercial-grade pans, primarily used in professional kitchens and too large for most home ovens.
- Half-Size (13″ x 18″): The “workhorse” of the home kitchen. It fits comfortably in most standard ovens, providing ample space for baking cookies, roasting vegetables, or preparing sheet pan dinners.
- Quarter-Size (9″ x 13″ or 9.5″ x 13″): Ideal for smaller tasks like toasting nuts, baking a few cookies, or using in toaster ovens.
- Eighth-Size (6.5″ x 9.5″): Perfect for very small batches or for organizing ingredients during meal prep.
- Jelly Roll Pan (typically 10″ x 15″ or 12″ x 17″): Similar to a half-sheet but often slightly shallower, traditionally used for thin sponge cakes meant for rolling.
Making the Smart Choice: Your Baking Sheet Tray Checklist
When you’re ready to invest in a new baking sheet tray, consider these points to ensure you pick the best one for your needs:
- Material: For all-around versatility and performance, prioritize aluminum or aluminized steel.
- Size: A half-sheet pan is a must-have for every home kitchen. Consider a quarter-sheet for smaller jobs.
- Gauge (Thickness): A lower gauge number indicates a thicker, more durable pan. Look for 10-12 gauge aluminum or aluminized steel to prevent warping.
- Rims: Opt for a rimmed baking sheet tray with reinforced, rolled edges. These provide structural integrity and prevent spills. While rimless cookie sheets exist for easy cookie sliding, a rimmed pan is far more versatile.
- Surface: Decide between uncoated for maximum durability and high-heat tolerance (paired with parchment or silicone) or non-stick for convenience.
Master Your Baking: Tips for Optimal Results
Even the best baking sheet tray needs a little help to shine. Here are some pro tips to elevate your baking:
- Always Line Your Pan: Parchment paper or silicone baking mats are your best friends. They provide a non-stick surface, promote even baking, prevent sticking, and make cleanup incredibly easy.
- Don’t Overcrowd: Give your food room to breathe! Overcrowding a baking sheet tray traps steam, leading to soggy results instead of crispy, golden perfection. If you have a large batch, use two pans.
- Use the Right Fat: For roasting, ensure your ingredients are lightly but thoroughly coated in oil or melted fat. This aids in browning and prevents sticking.
- Consider Pan Color: Lighter-colored, shiny pans reflect heat, leading to more even, slower baking, perfect for delicate cookies. Darker pans absorb more heat, resulting in faster browning and crispier textures, ideal for roasted potatoes or pizza crusts.
The Long Haul: Cleaning and Care for Your Baking Sheet Tray
Proper care extends the life of your baking sheet tray and ensures its continued performance.
- Handwashing is King: For uncoated aluminum and aluminized steel pans, handwashing with warm, soapy water is almost always recommended. Dishwashers can cause discoloration and lead to warping over time due to harsh detergents and high heat. While some non-stick pans are dishwasher-safe, handwashing is still gentler on the coating.
- Tackling Tough Stains: Don’t despair over baked-on grime!
- Baking Soda & Vinegar: For aluminum and aluminized steel, sprinkle baking soda, then spray with white vinegar. Let it fizz and sit for 30-60 minutes, then scrub gently with a non-abrasive sponge.
- Baking Soda & Hydrogen Peroxide: Mix into a paste, spread over the pan, let sit for 2-3 hours, then wipe and wash. This method is effective for aluminum, aluminized steel, and even some non-stick surfaces.
- Baking Soda & Dish Soap: A paste of baking soda and dish soap can also work wonders. Let it sit for 15-20 minutes before scrubbing.
- Aluminum Foil (Uncoated Only): For severely stuck-on residue on uncoated pans, crumple a piece of aluminum foil into a ball, add dish soap to the pan, and scrub.
- Avoid Abrasives: Steer clear of steel wool, harsh scouring pads, and metal utensils on any non-stick surface, as they can scratch and damage the coating. Use wooden, plastic, or silicone tools instead.
- Cool Down First: Never plunge a hot baking sheet tray into cold water. The sudden temperature change can cause it to warp and buckle. Let it cool completely before cleaning.
- Dry Thoroughly: Always dry your baking sheet tray completely after washing to prevent water spots and rust.
Avoiding Common Baking Sheet Tray Blunders
Even experienced bakers can fall prey to common baking sheet tray mistakes. Learning to identify and correct them will save you frustration and improve your results.
- Warping Woes: Hearing that loud “pop” in the oven? That’s your baking sheet tray warping, usually due to thin metal or sudden temperature changes. Invest in thicker-gauge pans and let them cool naturally before washing.
- Scratched Non-Stick: Using metal spatulas or knives on non-stick surfaces is a surefire way to ruin them. Stick to silicone, wood, or plastic.
- Uneven Cooking: This often stems from an overcrowded pan, preventing proper air circulation. Divide your ingredients onto multiple trays for optimal results.
- Skipping the Liner: Not lining your pan can lead to food sticking and a nightmare cleanup. Parchment paper or silicone mats are invaluable.
- Ignoring the Dirt: While a well-seasoned, slightly browned pan isn’t necessarily bad, excessive baked-on grease and grime can affect food safety and lead to uneven heat distribution. Regular cleaning is crucial.
- Holding Onto Severely Warped Pans: If a baking sheet tray is significantly warped, it can cause oils to pool and food to cook unevenly. Sometimes, it’s simply time for a replacement.
From Our Kitchen to Yours: Expert Insights
“A high-quality baking sheet tray is more than just a piece of equipment; it’s the foundation for culinary success,” advises Chef Eleanor Vance, a renowned expert in bakeware optimization. “It ensures even cooking, minimizes sticking, and truly elevates the joy of baking and roasting. Think of it as your culinary canvas – you want the best surface for your masterpiece.”
Frequently Asked Questions About Baking Sheet Trays
Q: What’s the difference between a baking sheet and a cookie sheet?
A: While often used interchangeably, a traditional cookie sheet usually has only one or two raised edges to allow cookies to slide off easily. A baking sheet tray, or sheet pan, typically has a raised rim on all four sides, making it more versatile for roasting and dishes with liquids.
Q: Can I use aluminum foil instead of parchment paper?
A: Yes, you can use aluminum foil for many tasks, especially roasting. However, parchment paper generally offers better non-stick properties, prevents food from reacting with the foil, and is often preferred for baking delicate items like cookies.
Q: Why does my baking sheet warp in the oven?
A: Warping usually occurs due to rapid temperature changes or if the pan is made from a thinner, higher-gauge metal. To minimize warping, choose a heavier-gauge pan and avoid shocking it with cold water immediately after it comes out of a hot oven.
Q: Are darker baking sheet trays better than lighter ones?
A: It depends on what you’re cooking. Darker pans absorb more heat, leading to faster browning and crispier results, which is great for pizza or roasted vegetables. Lighter, shiny pans reflect heat, resulting in more even and slower baking, ideal for cookies and cakes.
Q: How often should I clean my baking sheet tray?
A: Ideally, clean your baking sheet tray after every use. For light use, a quick wash with warm soapy water is sufficient. For stubborn stains, use one of the deep-cleaning methods outlined above as needed to prevent grime buildup.
Your Culinary Canvas Awaits
The baking sheet tray, though simple, is a cornerstone of a functional and enjoyable kitchen. By understanding the different materials, sizes, and care requirements, you empower yourself to make informed choices that directly impact the success of your culinary endeavors. From everyday sheet pan dinners to celebratory batches of cookies, your perfectly chosen and maintained baking sheet tray will be there, ready to help you create delicious memories. So go ahead, experiment with new recipes, explore different techniques, and let your “Bếp Nướng Hoàn Hảo” (Perfect Oven) journey begin with the right foundation.